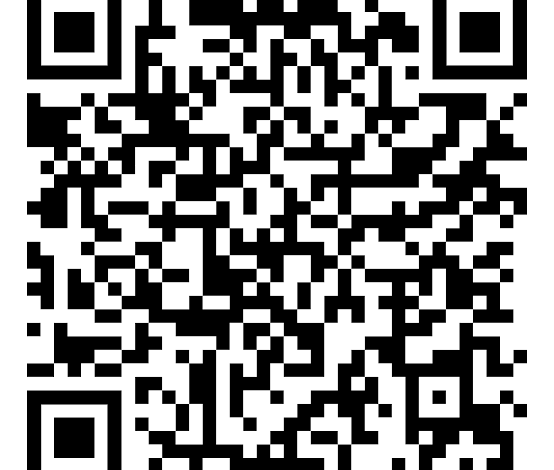
As you may know, a QR code scanner is a scanning device that is able to read QR codes. Most the phone has a built-in QR code scanner app.
In this blog, I’m not going to create a QR code scanner by the camera instead of this, in my QR code reader app, users can upload any QR code image and decode or extract the content from it, as you’ve seen in the image preview.
Using fetch API of JavaScript, I sent the user’s uploaded QR code to the API, and API processed the code and responded back to the data. If you’re already familiar with the fetch method, you can easily understand the logic and codes of this QR code reader.
But, if you’re unfamiliar with this, I want you to learn the fetch method or watch the above YouTube video multiple times to understand it. In the video, I’ve explained these things.
If you like this QR code scanner or reader and want to get source codes, you can easily copy or download them from the bottom of this page. I recommend you to download the files instead of copy.
QR Code Reader in JavaScript [Source Codes]
First, create an HTML file with the name index.html and paste the given codes into your HTML file. Remember, you’ve to create a file with .html extension.
<!DOCTYPE html>
<!-- Coding By CodingNepal - youtube.com/codingnepal -->
<html lang="en" dir="ltr">
  <head>
    <meta charset="utf-8">
    <title>QR Code Scanner or Reader | CodingNepal</title>
    <link rel="stylesheet" href="style.css">
    <meta name="viewport" content="width=device-width, initial-scale=1.0">
    <!-- Font Awesome CDN Link for Icons -->
    <link rel="stylesheet" href="https://cdnjs.cloudflare.com/ajax/libs/font-awesome/6.1.1/css/all.min.css">
  </head>
  <body>
    <div class="wrapper">
      <form action="#">
        <input type="file" hidden>
        <img src="#" alt="qr-code">
        <div class="content">
          <i class="fas fa-cloud-upload"></i>
          <p>Upload QR Code to Read</p>
        </div>
      </form>
      <div class="details">
        <textarea spellcheck="false" disabled></textarea>
        <div class="buttons">
          <button class="close">Close</button>
          <button class="copy">Copy Text</button>
        </div>
      </div>
    </div>

    <script src="script.js"></script>
  </body>
</html>
Second, create a CSS file with the name of style.css and paste the given codes in your CSS file. Remember, you’ve to create a file with .css extension.
/* Import Google Font - Poppins */
@import url('https://fonts.googleapis.com/css2?family=Poppins:wght@400;500;600;700&display=swap');
*{
  margin: 0;
  padding: 0;
  box-sizing: border-box;
  font-family: 'Poppins', sans-serif;
}
body{
  display: flex;
  align-items: center;
  justify-content: center;
  min-height: 100vh;
  padding: 0 10px;
  background: #E3F2FD;
}
.wrapper{
  height: 270px;
  width: 420px;
  border-radius: 7px;
  background: #0B85FF;
  padding: 30px 30px 35px;
  transition: height 0.2s ease;
  box-shadow: 0 10px 20px rgba(0,0,0,0.1);
}
.wrapper.active{
  height: 525px;
}
.wrapper form{
  height: 210px;
  display: flex;
  cursor: pointer;
  user-select: none;
  text-align: center;
  border-radius: 7px;
  background: #fff;
  align-items: center;
  justify-content: center;
  transition: height 0.2s ease;
}
.wrapper.active form{
  height: 225px;
  pointer-events: none;
}
form img{
  display: none;
  max-width: 148px;
}
.wrapper.active form img{
  display: block;
}
.wrapper.active form .content{
  display: none;
}
form .content i{
  color: #0B85FF;
  font-size: 55px;
}
form .content p{
  color: #0B85FF;
  margin-top: 15px;
  font-size: 16px;
}
.wrapper .details{
  opacity: 0;
  margin-top: 25px;
  pointer-events: none;
}
.wrapper.active .details{
  opacity: 1;
  pointer-events: auto;
  transition: opacity 0.5s 0.05s ease;
}
.details textarea{
  width: 100%;
  height: 128px;
  outline: none;
  resize: none;
  color: #fff;
  font-size: 18px;
  background: none;
  border-radius: 5px;
  padding: 10px 15px;
  border: 1px solid #fff;
}
textarea::-webkit-scrollbar{
  width: 0px;
}
textarea:hover::-webkit-scrollbar{
  width: 5px;
}
textarea:hover::-webkit-scrollbar-track{
  background: none;
}
textarea:hover::-webkit-scrollbar-thumb{
  background: #fff;
  border-radius: 8px;
}
.details .buttons{
  display: flex;
  margin-top: 20px;
  align-items: center;
  justify-content: space-between;
}
.buttons button{
  height: 55px;
  outline: none;
  border: none;
  font-weight: 500;
  font-size: 16px;
  cursor: pointer;
  color: #0B85FF;
  border-radius: 5px;
  background: #fff;
  transition: transform 0.3s ease;
  width: calc(100% / 2 - 10px);
}
.buttons button:active{
  transform: scale(0.95);
}

@media (max-width: 450px) {
  .wrapper{
    padding: 25px;
    height: 260px;
  }
  .wrapper.active{
    height: 520px;
  }
}
Last, create a JavaScript file with the name script.js and paste the given codes in your JavaScript file. Remember, you’ve to create a file with .js extension.
const wrapper = document.querySelector(".wrapper"),
form = document.querySelector("form"),
fileInp = form.querySelector("input"),
infoText = form.querySelector("p"),
closeBtn = document.querySelector(".close"),
copyBtn = document.querySelector(".copy");

function fetchRequest(file, formData) {
    infoText.innerText = "Scanning QR Code...";
    fetch("http://api.qrserver.com/v1/read-qr-code/", {
        method: 'POST', body: formData
    }).then(res => res.json()).then(result => {
        result = result[0].symbol[0].data;
        infoText.innerText = result ? "Upload QR Code to Scan" : "Couldn't scan QR Code";
        if(!result) return;
        document.querySelector("textarea").innerText = result;
        form.querySelector("img").src = URL.createObjectURL(file);
        wrapper.classList.add("active");
    }).catch(() => {
        infoText.innerText = "Couldn't scan QR Code";
    });
}

fileInp.addEventListener("change", async e => {
    let file = e.target.files[0];
    if(!file) return;
    let formData = new FormData();
    formData.append('file', file);
    fetchRequest(file, formData);
});

copyBtn.addEventListener("click", () => {
    let text = document.querySelector("textarea").textContent;
    navigator.clipboard.writeText(text);
});

form.addEventListener("click", () => fileInp.click());
closeBtn.addEventListener("click", () => wrapper.classList.remove("active"));